
Last updated: January 2026
So you’ve decided to try winter swimming.
Maybe you’ve been swimming through summer and autumn and you’re curious if you can keep going through winter. Maybe you’ve seen the Instagram posts of smiling people in ice-cold water and wondered what the fuss is about. Maybe your swimming mates have been raving about the “cold water high” and you want to experience it yourself.
Whatever brought you here, let me say this: winter swimming is genuinely one of the most rewarding outdoor activities you can do. The mental clarity, the sense of accomplishment, the way it makes you feel alive—there’s nothing quite like it.
But it’s also potentially dangerous if you don’t know what you’re doing.
I’ve been winter swimming in the Lake District for five years. I’ve made mistakes, learned from experienced swimmers, and watched too many newcomers jump in unprepared. This guide is everything I wish someone had told me before my first winter swim.
Before Your First Winter Swim: The Prerequisites
Let’s start with something important: winter swimming isn’t where you start your open water swimming journey.
If you’ve never done open water swimming before, start in summer. Build up your confidence, your technique, and your understanding of how your body responds to colder water. Autumn is for transitioning. Winter is for those who’ve done the groundwork.
Minimum experience recommended:
- At least 10 open water swims in summer/autumn conditions
- Experience with water below 15°C
- Comfortable swimming without a wetsuit (or ready to transition away from one)
- Understanding of your personal cold tolerance
- Basic open water safety knowledge
If you’re jumping straight into winter swimming without this foundation, you’re significantly increasing your risk. There’s no shame in waiting until summer to start your open water swimming journey.
Understanding the Risks: What Makes Winter Swimming Dangerous
Winter swimming isn’t just “a bit colder than summer.” The physiological challenges are completely different.
Cold Water Shock (0-3 Minutes)
The moment you enter water below 15°C, your body experiences cold water shock:
- Involuntary gasp reflex
- Hyperventilation
- Rapid increase in heart rate and blood pressure
- Potential panic response
The danger: Inhaling water during the gasp reflex can lead to drowning. Hyperventilation can cause panic, which impairs decision-making. Cardiac stress can trigger heart problems in susceptible individuals.
The reality: Cold water shock is why more cold water drownings happen within the first 3 minutes of immersion than at any other time.
Swimming Incapacitation (After 5-10 Minutes)
After the initial shock passes, your extremities begin to cool rapidly:
- Loss of sensation in hands and feet
- Reduced muscle function
- Declining coordination and swimming ability
- Compromised decision-making
The danger: You may become unable to swim effectively or exit the water safely.
Hypothermia (After 20-30 Minutes)
Prolonged exposure leads to dropping core temperature:
- Mild hypothermia: 35-36°C core temperature
- Symptoms include confusion, shivering, reduced coordination
- Can progress rapidly if not addressed
The danger: Impaired judgment means you may not recognize you’re in trouble.
Afterdrop (10-40 Minutes Post-Exit)
After exiting the water, your core temperature continues to drop:
- Caused by cold blood returning from extremities to core
- Can be more severe than cold experienced in the water
- Leads to violent shivering, loss of dexterity, cognitive impairment
The danger: This is when many swimmers make critical mistakes—attempting to drive before they’re functional, inadequate recovery clothing, poor decision-making.
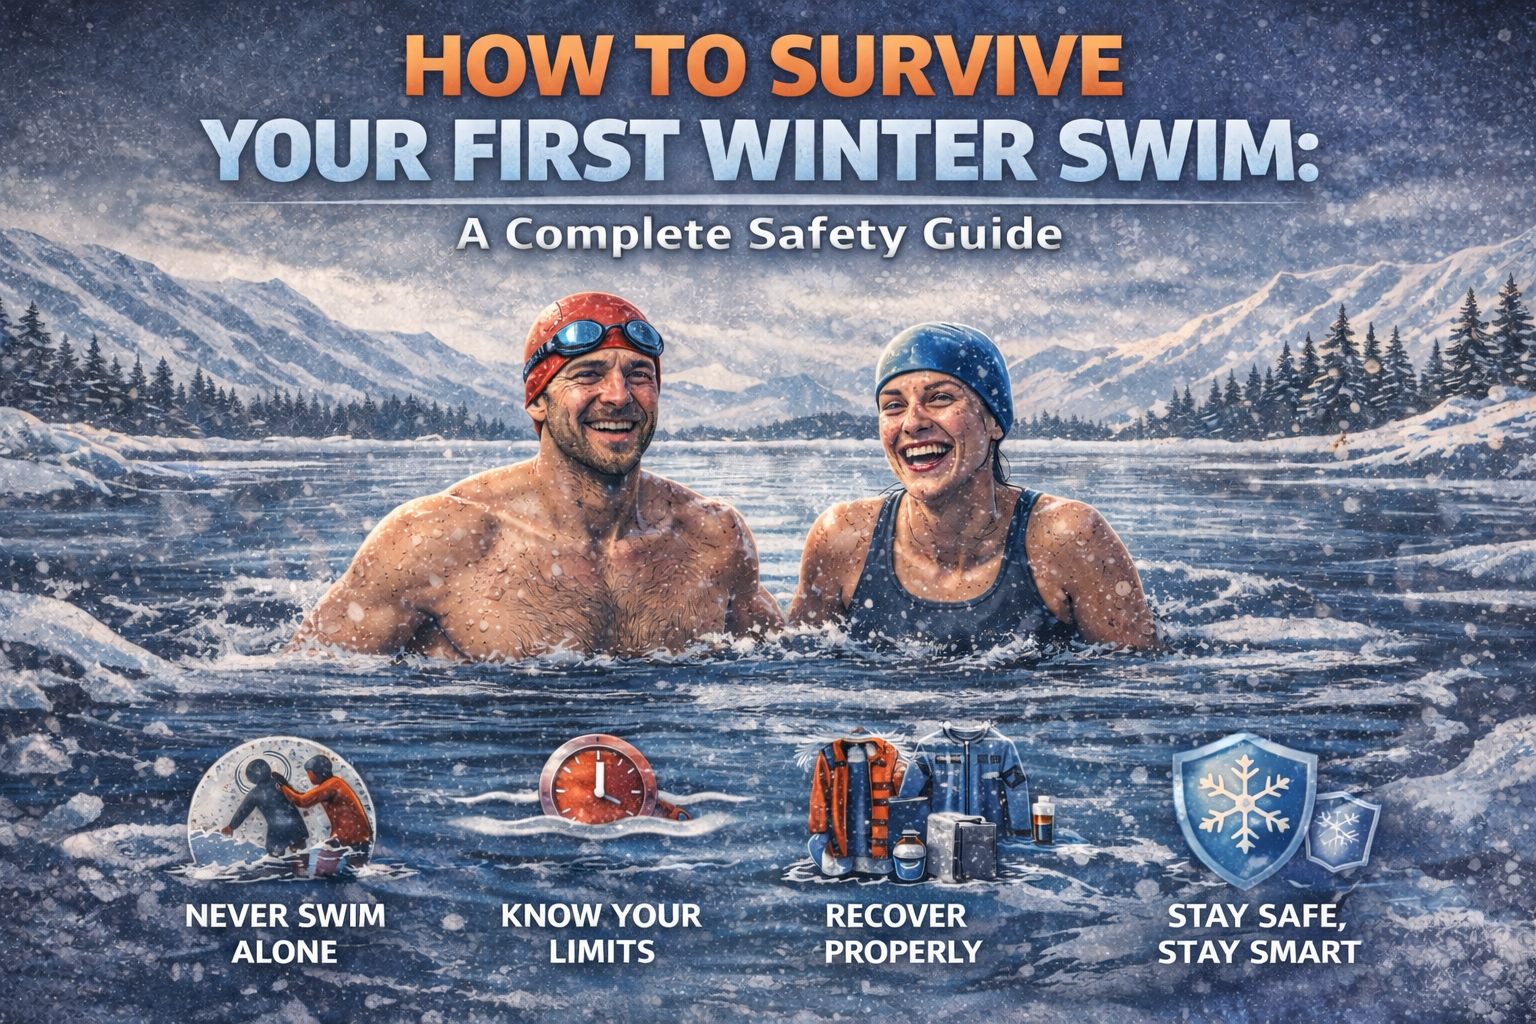
The Golden Rules of Winter Swimming
These aren’t suggestions—they’re non-negotiable safety requirements.
Rule 1: Never Swim Alone
Ever. Not even “just for a minute.” Not even “I’m just going to dip.”
Why: If something goes wrong in cold water, it happens fast. Cold water shock can be instantaneous. Swimming incapacitation can occur within minutes. You need someone on shore who can call for help or assist if needed.
Minimum: One competent adult on shore, fully dressed, watching you continuously, with a phone to call emergency services.
Better: Swim with a buddy who’s also in the water, with a third person on shore watching both of you.
Rule 2: Acclimatize Gradually
You cannot jump from 18°C water to 4°C water without consequences.
Proper acclimatization:
- Swim regularly (minimum 2x per week) through autumn
- Each swim, water should be no more than 1-2°C colder than previous
- Don’t skip weeks—consistency is essential
- Accept that missed time means starting over
What happens with proper acclimatization:
- Your body adapts to peripheral vasoconstriction
- Your cold water shock response diminishes
- Your psychological response to cold improves
- Your recovery time decreases
What happens without acclimatization:
- Severe cold water shock
- Rapid onset of incapacitation
- Dangerous afterdrop
- High risk of hypothermia
Timeline: Expect 6-8 weeks of consistent swimming to acclimatize from 15°C to 5°C water.
Rule 3: Swim Short and Get Out Before You Feel Cold
This is the hardest rule for new winter swimmers to follow. The temptation to swim “just a bit longer” is strong.
Resist it.
Safe swimming duration guidelines:
- 10°C water: 10-15 minutes maximum for newcomers
- 5-10°C water: 5-10 minutes maximum
- Below 5°C: 2-5 minutes, proceeding with extreme caution
These times assume you’re acclimatized and experienced. For your first few winter swims, cut these times in half.
The critical principle: Exit before you feel cold in the water. If you’re thinking “I’m getting cold now,” you’ve stayed too long. The afterdrop will be worse.
Rule 4: Proper Recovery Gear Is Non-Negotiable
Summer swimmers can get away with minimal post-swim gear. Winter swimmers cannot.
Essential recovery equipment:
- Changing robe or dryrobe for immediate upper body coverage
- Warm base layer (merino wool, not cotton)
- Insulated trousers (like Cuddlr fleece-lined trousers) for lower body warmth
- Thermal hat
- Thick wool socks
- Hot drink in insulated bottle
- Changing mat to keep feet off cold ground
Why this matters: Proper recovery gear can reduce afterdrop severity by up to 60%. This isn’t luxury—it’s safety equipment.
Rule 5: Know Your Exit Strategy
Before you enter the water, know exactly how you’ll get out and where you’ll recover.
Essential planning:
- Identify your exit point before entering
- Ensure exit is accessible even with impaired coordination
- Have recovery gear laid out and ready
- Plan sheltered spot for changing
- Know where you’ll warm up
- Have backup plan if primary exit is compromised
Red flag locations:
- Steep or slippery banks
- Strong currents near exit
- No shelter from wind
- Isolated locations with no backup
- Areas with boat traffic
Your First Winter Swim: Step-by-Step Protocol
Three Days Before
Medical check: If you have any cardiovascular conditions, high blood pressure, or underlying health concerns, consult a doctor before winter swimming.
Acclimatization check: Have you been swimming regularly in progressively colder water? If not, postpone until you have.
The Night Before
Sleep well: Fatigue increases cold sensitivity and impairs judgment.
Hydrate: Proper hydration improves thermoregulation.
Plan: Check weather forecast, identify exact location and exit point, confirm swimming buddy.
Morning Of
Eat properly: Have a substantial breakfast 1-2 hours before swimming. Your body needs fuel for thermogenesis.
Prepare hot drinks: Fill insulated bottle with very hot sweet tea or hot chocolate.
Pack systematically:
- Swim kit (goggles, cap, tow float)
- Recovery gear (dryrobe, base layer, Cuddlr trousers, hat, socks, gloves)
- Changing mat
- Multiple towels (one for rough drying, one for standing on)
- Hot drink
- High-calorie snacks
- Warm clothes for driving home
- Phone (for emergency)
At The Swim Spot (30 Minutes Before)
Set up your recovery area:
- Lay out changing mat in sheltered spot
- Arrange recovery clothes in order you’ll put them on
- Position hot drink within easy reach
- Ensure swimming buddy knows the plan
Physical preparation:
- Light movement to warm up (gentle stretching, walking)
- Don’t get sweaty—you want to be warm, not overheated
- Put on swim cap and goggles while still on shore
Mental preparation:
- Review your time limit and exit point
- Commit to getting out when planned (not “just one more minute”)
- Visualize the entire swim and recovery process
Entering the Water (3-5 Minutes)
Gradual entry is essential:
- Wade in slowly up to your thighs
- Splash water on your face and neck to trigger diving reflex
- Wait 30-60 seconds, focusing on controlled breathing
- Submerge to chest level gradually
- Wait another 30 seconds
- Begin swimming only when breathing is controlled
During entry:
- Expect the gasp reflex—this is normal
- Focus on exhaling slowly and deliberately
- Never put your face in the water until breathing is controlled
- If you experience panic, retreat to shallower water immediately
Danger signs during entry:
- Inability to control breathing after 2-3 minutes
- Feeling faint or dizzy
- Chest pain or extreme discomfort
- Overwhelming urge to get out
If you experience danger signs: Get out immediately. This isn’t failure—it’s good judgment.
During the Swim (5-10 Minutes Maximum)
Swim conservatively:
- Stay close to shore (within 20 meters)
- Swim parallel to shore, not away from it
- Maintain steady, sustainable pace (not sprint, not slow)
- Keep head up so you can see shore and communicate
Monitor yourself continuously:
- Can you feel your hands and feet?
- Is your breathing steady?
- Can you swim in a straight line?
- Are you thinking clearly?
Exit immediately if:
- You lose sensation in hands or feet
- Breathing becomes difficult
- You feel disoriented or confused
- You feel colder than you can tolerate
- You reach your planned time limit (even if you feel “fine”)
Swimming buddy responsibilities:
- Stay within communicating distance
- Watch your swimming partner continuously
- Check in verbally every 2-3 minutes
- Be prepared to assist if needed
Exiting the Water (30 Seconds)
Move deliberately but don’t rush:
- Walk out calmly (rushing can trigger light-headedness)
- Be careful on slippery surfaces
- Get to your changing mat as directly as possible
Immediate actions:
- Rough dry with towel (quick, not thorough)
- Put on thermal hat immediately
- Begin changing process
Recovery Phase (5-20 Minutes)
Changing sequence (in this order):
- Dry torso roughly
- Pull on dry base layer (merino wool)
- Pull on thick wool socks
- Pull on insulated trousers (Cuddlr or similar)
- Get into changing robe/dryrobe
- Put on neoprene gloves if hands are very cold
Active recovery:
- Start drinking hot beverage immediately
- Do gentle movement (walking, marching in place)
- Stay in sheltered area away from wind
- Keep changing robe on for full 15-20 minutes
What’s normal:
- Shivering that increases then gradually decreases
- Feeling colder for first 10 minutes post-exit
- Mild difficulty with coordination for 5-10 minutes
- Strong desire to get warm
What’s NOT normal (seek help):
- Confusion or inability to think clearly
- Violent shivering that won’t stop
- Inability to dress yourself
- Slurred speech
- Feeling faint or dizzy
- Nausea
Post-Recovery (20-40 Minutes)
Before leaving:
- Ensure shivering has stopped or significantly reduced
- Confirm you can think clearly and speak normally
- Have a snack (your body needs the energy)
- Change into completely dry clothes for driving
Driving considerations:
- Don’t drive if you still feel impaired
- Turn car heater on gradually (not maximum immediately)
- If needed, wait longer before driving
- Consider having someone else drive you home
Common First-Timer Mistakes (And How to Avoid Them)
Mistake 1: “I’m only going in for a quick dip, I don’t need all that gear”
Reality: Afterdrop doesn’t care about your swim duration. A 2-minute dip can still cause significant afterdrop requiring proper recovery gear.
Solution: Bring full recovery gear for every winter swim, regardless of planned duration.
Mistake 2: “I felt fine during the swim, so I stayed longer”
Reality: Feeling “fine” in the water doesn’t predict afterdrop severity. The cold is accumulating in your outer body even if you feel okay.
Solution: Set a time limit before you enter and stick to it religiously.
Mistake 3: “I’ll just warm up in my car with the heater on”
Reality: Sitting in a car in damp swimwear with wind chill from wet skin is a terrible recovery strategy. You need insulation first, heat second.
Solution: Get proper insulated layers on your body before relying on external heating.
Mistake 4: “I’m tough, I don’t need to acclimatize gradually”
Reality: Acclimatization is physiological adaptation, not mental toughness. Your cardiovascular system needs time to adapt to cold stress.
Solution: Follow the gradual acclimatization protocol regardless of how tough you think you are.
Mistake 5: “My friend swims for 20 minutes in 4°C water, so I should be able to as well”
Reality: Individual cold tolerance varies dramatically based on body composition, acclimatization, fitness, and genetics.
Solution: Swim your own swim. Never compete with others on duration or frequency.
Mistake 6: “I’ll just tough out the afterdrop”
Reality: Severe afterdrop isn’t a character-building exercise—it’s a physiological crisis that can progress to hypothermia.
Solution: If afterdrop is severe, seek help. There’s no shame in needing assistance.
Building Your Winter Swimming Practice Sustainably
One winter swim doesn’t make you a winter swimmer. Building a sustainable practice requires consistency, patience, and realistic expectations.
First Winter: Survival Mode
Goals:
- Acclimatize safely from autumn into winter
- Learn your personal cold tolerance
- Develop reliable recovery protocols
- Build confidence gradually
Realistic expectations:
- Swims will be short (5-10 minutes)
- Recovery will be uncomfortable
- You’ll make mistakes and learn from them
- Some days you’ll be too cold and need to skip
Success metric: Reaching spring having swum regularly through winter without serious incidents.
Second Winter: Competence
Goals:
- Swim more consistently (2-3x per week)
- Slightly longer durations as acclimatization improves
- Refined recovery protocols
- Increased confidence
Realistic expectations:
- Still occasional difficult swims
- Continued learning about your body’s responses
- More efficient recovery
- Enjoyment starting to outweigh discomfort
Third Winter and Beyond: Mastery
Goals:
- Confident year-round swimming
- Understanding your limits precisely
- Efficient recovery that feels routine
- Ability to mentor newcomers
Realistic expectations:
- Winter swimming feels sustainable
- Recovery is well-managed
- You can swim in most conditions safely
- Deep understanding of personal physiology
When NOT to Swim: Knowing Your Limits
Part of winter swimming safely is knowing when to skip a swim.
Skip your swim if:
- You’re feeling unwell (cold, flu, fever, fatigue)
- You haven’t been sleeping well
- You’re hungover or have consumed alcohol recently
- Water temperature has dropped significantly since your last swim
- Weather conditions are dangerous (lightning, extreme wind, flooding)
- You’re alone and no one else is available
- You’re feeling anxious or uncertain about conditions
- You’ve experienced injury or unusual health symptoms
There’s no shame in skipping a swim. Every experienced winter swimmer has days where they show up, assess conditions, and decide “not today.” This is good judgment, not weakness.
The Mental Game: What Winter Swimming Actually Feels Like
Let me be honest about what your first winter swim will feel like, because the Instagram posts don’t tell the whole story.
The reality:
- The entry will be uncomfortable. Not “ooh that’s chilly”—genuinely uncomfortable.
- Your body will scream at you that this is a bad idea. This is normal.
- The first 2-3 minutes will be the hardest. Your breathing will be affected.
- After 3-5 minutes, you might feel surprisingly okay. Don’t be fooled—afterdrop is waiting.
- Exiting will feel fine initially. You might even feel slightly warm.
- 5-10 minutes post-exit, the cold will hit. This is the afterdrop.
- 10-20 minutes post-exit will be the coldest you feel. Shivering will be intense.
- 20-30 minutes post-exit, you’ll start to feel human again.
- 30-40 minutes post-exit, you’ll feel warm and maybe even euphoric.
That euphoria is what keeps people coming back. But you have to get through the first 40 minutes to experience it.
The first few winter swims are about survival. The enjoyment comes later, after you’ve developed your protocols and built confidence. Don’t expect your first winter swim to be “fun” in the conventional sense. Expect it to be challenging, educational, and ultimately rewarding.
Essential Reading and Resources
Before your first winter swim, educate yourself further:
Books:
- “Chill: The Cold Water Swim Cure” by Sophie Mackenzie
- “The Ice Cure” by Dr. David Vyvyan
Websites:
- Outdoor Swimming Society (outdoorswimmingsociety.com)
- Swim England’s cold water swimming guidance
- RLSS UK’s open water safety information
Medical research:
- Search “Tipton cold water immersion” for academic research
- International Journal of Circumpolar Health publications on cold water
Finding Your Swimming Community
Winter swimming is significantly safer and more enjoyable with a community.
How to find your people:
- Search for local open water swimming groups on Facebook
- Check Swim England’s website for affiliated clubs
- Visit local swimming spots early morning (when winter swimmers gather)
- Join the Outdoor Swimming Society
- Attend open water swimming events in your region
Benefits of swimming with a group:
- Safety (group supervision)
- Shared knowledge from experienced swimmers
- Motivation on difficult days
- Social connection and accountability
- Access to local knowledge about conditions
Red flags in swimming groups:
- Pressure to swim longer or in conditions you’re not comfortable with
- Dismissive attitude toward safety concerns
- Lack of organization or safety protocols
- Encouraging beginners to “just go for it”
A good swimming community supports sensible decision-making, celebrates conservative choices, and prioritizes safety over bravado.
Final Thoughts: The Journey Ahead
Your first winter swim is the beginning of a journey that can transform your relationship with cold, with nature, and with yourself.
Will it be easy? No.
Will it be comfortable? Not at first.
Will it be worth it? Absolutely.
Winter swimming has given me mental resilience I didn’t know I had. It’s taught me to distinguish between discomfort and danger. It’s connected me with an incredible community of people who swim in all weather because the rewards are profound.
But it’s also taught me respect—for cold water, for the body’s physiological responses, for the thin line between challenge and recklessness.
Approach your first winter swim with proper preparation, adequate equipment, and realistic expectations. Learn from each swim. Build your protocols. Listen to your body. Prioritize safety over social media-worthy duration claims.
The cold water will still be there tomorrow. Take your time. Do it right.
See you in the water, future Winter Dipper. Welcome to the tribe.
—Written by a Lake District swimmer who remembers the terror and exhilaration of that first winter swim five years ago